byte color[10][3] =
{
{0,0,0} /*black*/,
{30,9,0} /*brown*/,
{100,0,0} /*red*/,
{128,60,0} /*orange*/,
{110,120,0} /*yellow*/,
{0,64,0} /*green*/,
{0,0,111} /*blue*/,
{64,0,63} /*violet*/,
{15,15,15} /*grey*/,
{127,127,127}/*white*/
};
The clock code is trivial, especially because it's using the great Neopixel library. Below is the most important function:
void displayTime()
{
byte digit1 = hour/10;
byte digit2 = hour%10;
strip.setPixelColor(0, strip.Color(color[digit1][0], color[digit1][1], color[digit1][2]));
strip.setPixelColor(1, strip.Color(color[digit2][0], color[digit2][1], color[digit2][2]));
digit1 = minute/10;
digit2 = minute%10;
strip.setPixelColor(3, strip.Color(color[digit1][0], color[digit1][1], color[digit1][2]));
strip.setPixelColor(4, strip.Color(color[digit2][0], color[digit2][1], color[digit2][2]));
digit1 = second/10;
digit2 = second%10;
strip.setPixelColor(6, strip.Color(color[digit1][0], color[digit1][1], color[digit1][2]));
strip.setPixelColor(7, strip.Color(color[digit2][0], color[digit2][1], color[digit2][2]));
strip.show();
}
Even though this photo sucks, I added it only as proof :)
The time is shown as "HH MM SS", with spaces between hours, minutes and seconds. 0 is represented by an unlit (off) pixel. It is easy to get used to the colors, with help from the changing seconds.
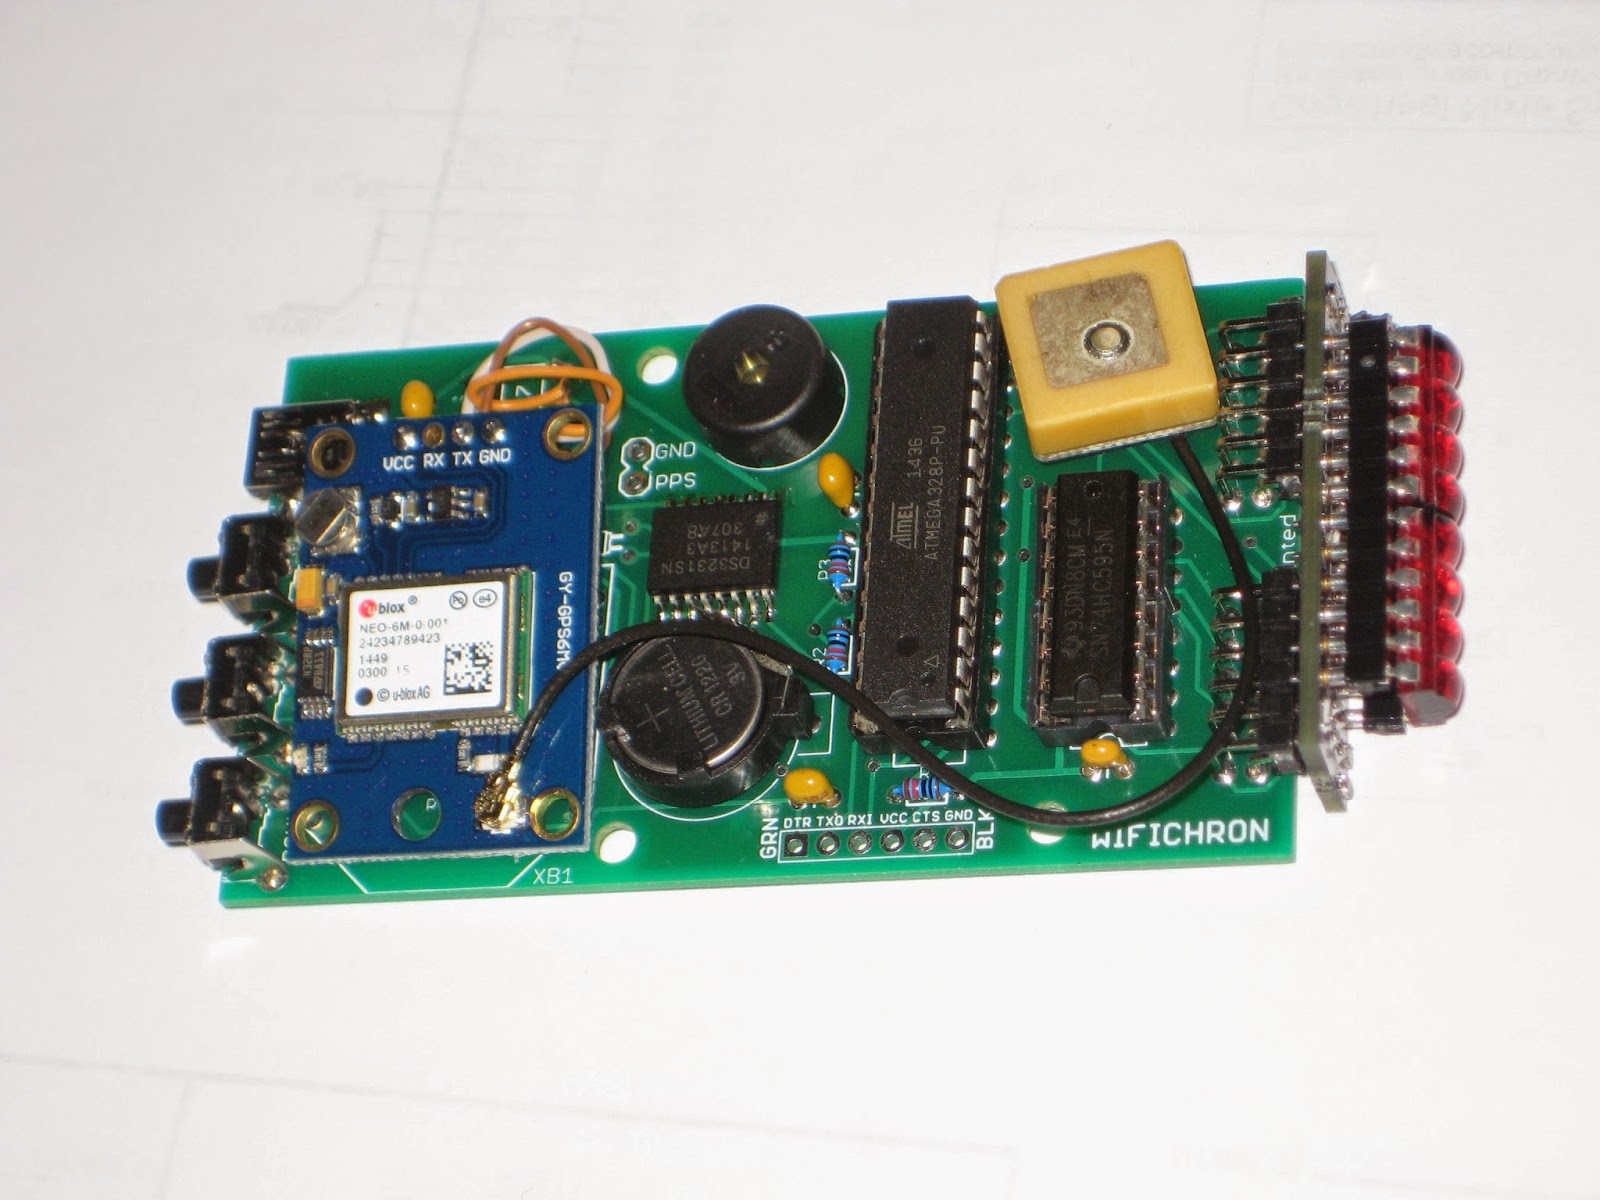
Note that the 595 shift register on the board is not used (could even be removed, or not mounted at all).

If you really want everything to fit in the Serpac A20 box, you need to replace the original antenna with a smaller one (but working just fine), as shown in the next photo.
Thirdly, Craig (thanks very much!) published on thingiverse the plans for a 3D-printed enclosure he designed for Wise Clock 4:


